Following my last post on a simplified PSoC3 board,a friend of mine re-designed it,and sent it over for testing.
Here are some pictures,linked over from his account on fabricating this:
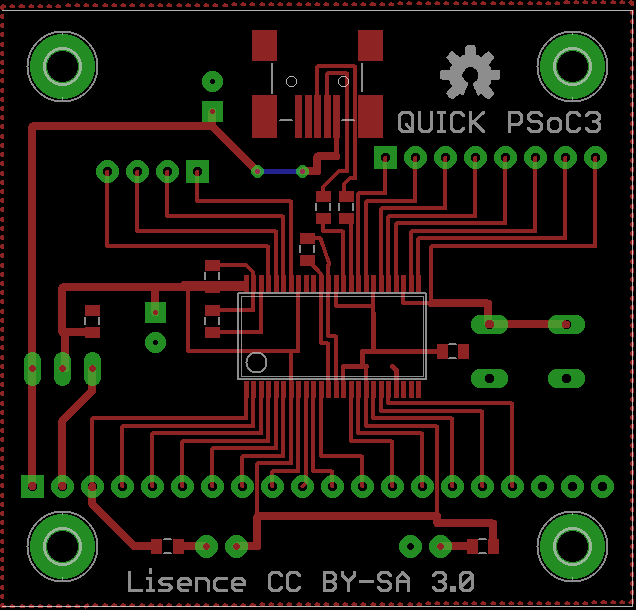
I'll clean up the files and upload them soon.The files(PCB files made in EAGLE V5.8.0 and Bootloader Project,made in PSoC Creator 2.0) are linked here,from my 4shared account.
Heres what it looks like after those few crazy hours:
Feel free to send in suggestions,criticism,feedback via the comments.
This work is licensed under a Creative Commons Attribution-ShareAlike 3.0 Unported License.
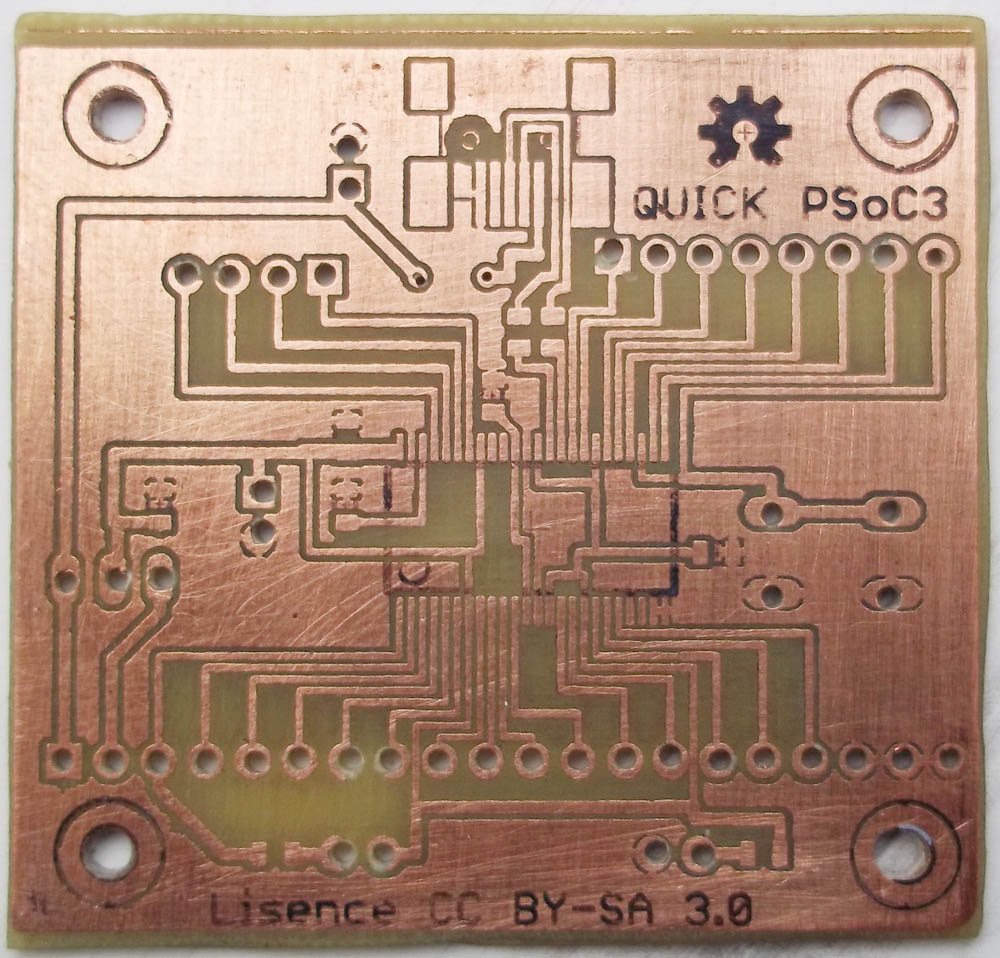
Here are some pictures,linked over from his account on fabricating this:
and in its coppery glory,
(I don't have access to a camera,so you'll have to put up with my wacky narration.)
It was now my turn to add the chip and program this one.I had some issues with VCC-GND shorts(yeah,theyre the worst) beneath the chip(no soldermask,eh?),so I had to desolder the chip once and then do it again.Now,desoldering this seemed like a near impossible task,but I used this method here(Youtube Video Link) and though it looked impossible to me,it worked just as easily as the video shows!..
So a after a few tense minutes,and the 'Aha!' moment of eliminating the short,and then getting the chip back where it belonged,I found I had a short again.Examining the tracks revealed that the initial short had burnt up a small bit from each of the VDDD and GND pins and they were sitting in a black pool of flux.Since I didn't have any solvent with me,I tried flooding the pins with solder and then wiping that area clean with some solder wick.The mess was cleaned up,to reveal a small bit of track missing from each of the VDDD and GND pins.So I lifted those up with tweezers and re-wired them manually to their correct locations.
With that done,though it looked ugly,it behaved beautifully.The MiniProg3 picked it up easily,and I was successfully able to program the bootloader in,and then a simple LED blinking bootloadable,with surprising ease.I must say,this USB bootloading stuff(Appnote link) is pretty neat!
So the point is,a single sided,easy to use PSoC3 board with USB Bootloading? No sweat.
Heres what it looks like after those few crazy hours:
Feel free to send in suggestions,criticism,feedback via the comments.
This work is licensed under a Creative Commons Attribution-ShareAlike 3.0 Unported License.
Well done Karthik..
ReplyDeleteSorry for the late response kiran,thanks so much for the encouragement and compliments!
DeleteThis looks wonderful ! Why don't you commercialize this? The dev kits that Cypress sells are way too costly!
ReplyDeleteCheers from a fellow BITSian! :-)
DeleteHey Shashank! Thanks for the compliments,you made my day! :-)
ReplyDeleteI am working on the next version of this board,which is easier to assemble and all,specifically soldering the chip.
This board can be made easily at home with the toner transfer method,and as far as commercialization goes,I'm am working on the details to submit proposals to various vendors.
I'll start work on an arduino compatible PSoC board,for which I plan to approach Sparkfun.
Hey kmmankad, for going commercial you may want to contact Entesla, they already have psoc1 board, http://entesla.com/easy-psoc1-development-board
ReplyDeleteGood Luck.
Hey Deepak,Thanks for the info :)
ReplyDeleteLately I havent been getting time for this hobby stuff with a full time job and all.